Beatbox 9
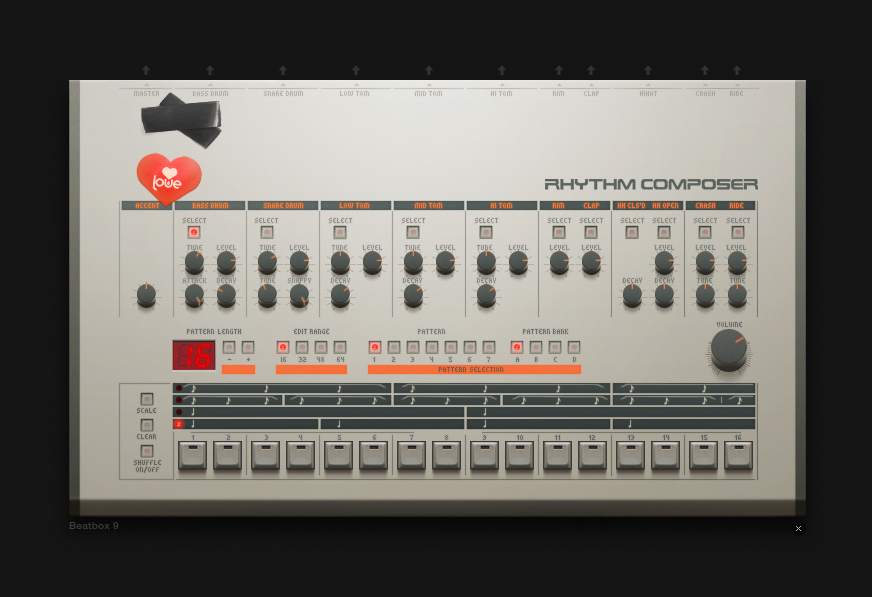
The Beatbox 9 is very similar in functionality to the Beatbox 8 with the instrument channels labelled across the top and the step sequencer along the bottom. Making a drum sequence with the Beatbox 9 is also nearly exactly the same as with the Beatbox 8, select which instrument you want to use and add it to the sequence by clicking on the steps in the sequence. Although similar to the Beatbox 8 the Beatbox 9 could be said to sound more realistic since some of the instruments are sampled drum hits as well as this the device has a much rounder and clearer overall sound than the Beatbox 8.

Instrument Controls
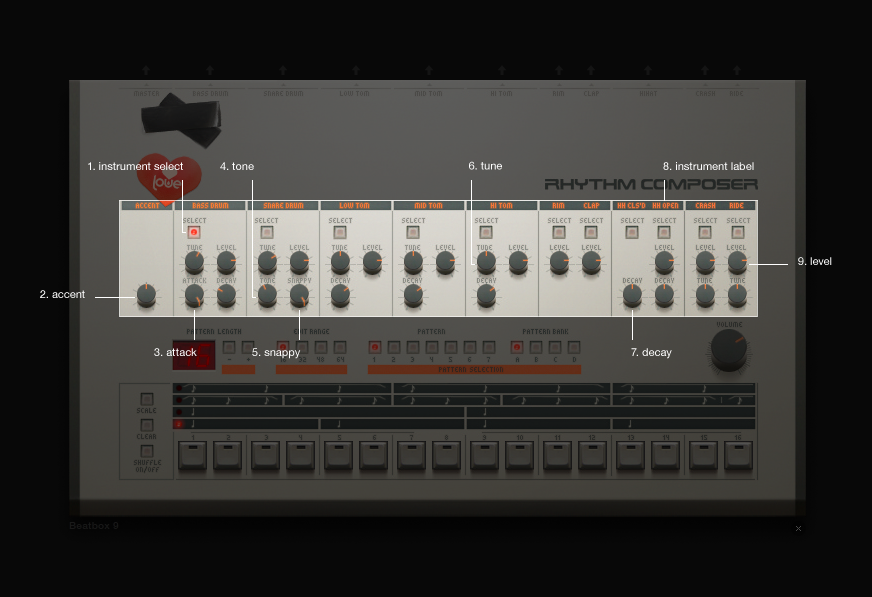
The Beatbox 9 is sequenced by selecting the instrument you want to use and then clicking on the sequencing button or buttons that correspond to where you want to the hit to occur in the sequence. Only one instrument can be added to the sequence at a time. Each instrument has its own set of parameter controls which allow for the sound of each instrument to be modified individually.

instrument select - Use this button to select what instrument you want to use. Red denotes that the instrument is currently selected.
accent - The accent feature allows for emphasis to be placed under selected steps in the sequence. Adding accent to a step in the sequence is the same as adding a drum hit to the sequence, select the accent as the instrument and select what nots you want to accent with the sequencer. The strength of the accented steps can be defined by using the the accent level control.
attack - Alters the attack of the hit. Will change the strength of the hit. (bassdrum only)
tone - The Tone parameter allows adjustment of the length or the decay of the snare’s tone.
snappy - Control over the volume of the snare’s tone.
tune - Allows for the pitch of the instrument to be altered.
decay - Control over the decay of the hit.
instrument label - instrument label.
level - The level control allows for adjustment of the volume of each instrument individually.
Sequencer Controls
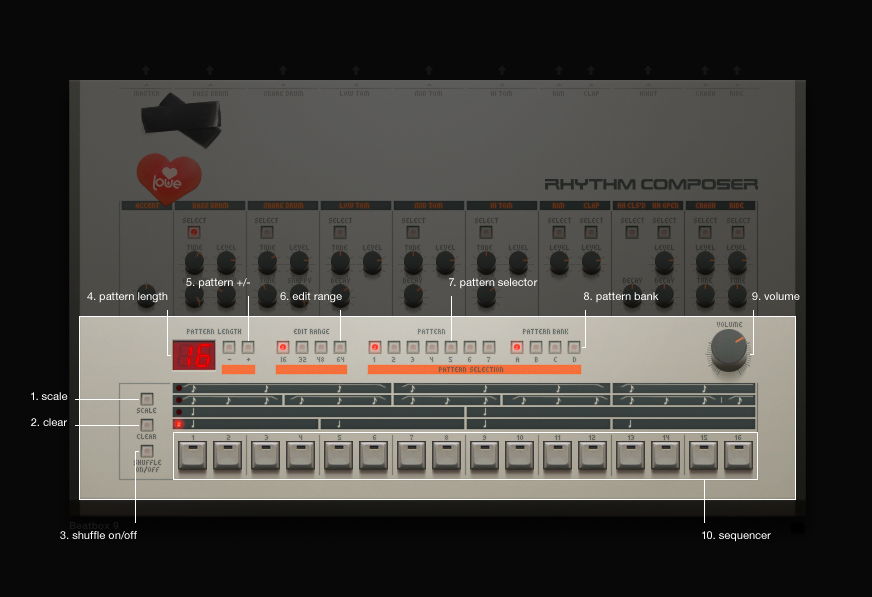
Across the bottom of the Beatbox 9 is where the device’s internal sequencer is found. Once an instrument has been selected you can start building up your drum sequence by adding instrument hits to the sequencer by selecting the sequence buttons.

scale - Allows definition of what scale your sequence will be using.
clear - Will clear the currently selected pattern.
shuffle on/off - Using the shuffle option will shuffle your pattern. Audiotool does this by selecting keynotes in your sequence and then moving or shuffling all of the note in-between the keynotes either forward or backwards.
pattern length - Displays the length of your sequence.
pattern +/- - Allow for the length of your sequence to be increased or decreased. TIP! Holding down SHIFT while selecting these buttons will allow you to double of half the number of steps in your sequence, from 2-4, from 16-32 etc.etc.)
edit range - The sequencer contains 16 step buttons but the Beatbox 9 allows for sequences up to 64 steps long. This control allows for you to use the same 16 buttons to edit a 64 step sequence by reusing the same step buttons to edit different parts of the sequence.
pattern selector - Use these buttons to decide which pattern from your currently selected pattern bank you want to work on.
pattern bank - Allows for toggling through the device’s different pattern banks (A, B, C and D)
volume - Master volume control.
sequencer - The Beatbox 9’s internal sequencer consists of 16 buttons, each button has a corresponding position in the the sequence. Add hits to the sequence by selecting the instrument you want to work with and then selecting the buttons in the sequence where you want the hit to be played.