Your first project
The following is a tutorial on how to create a small audio track on Audiotool and publish it on your profile from start-to-finish.
- You’ll learn how to:
add synthesizers and other instruments to your project
add a melody to your project
browse and add samples to the project
arrange the instruments and samples in a project
export and publish the project to your profile, allowing others to remix it
Getting started
Creating a new project
Audiotool itself is the place to share your tracks, listen to other’s tracks, and interact with other Audiotool users.
To create your own track, you first have to open the studio in the top bar:

The studio splash screen will open, where you can choose to open recent projects, demo projects, or browser your whole library of projects. We’re gonna start a new project from scratch, so click this button:
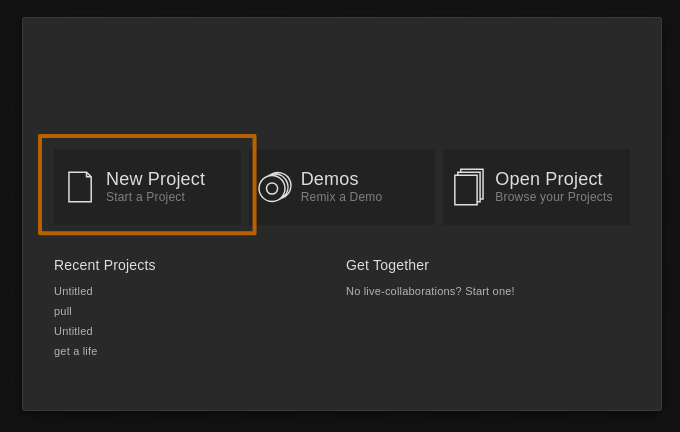
This will create a new project and save it to your browser’s temporary storage. It’s good practice to store the project to your profile so you can open it from any browser anywhere.
Press File -> Save
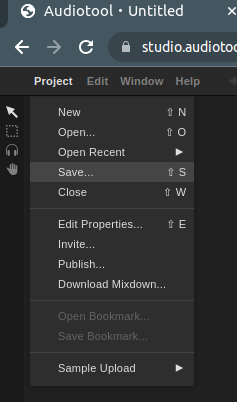
This will open the following dialogue:
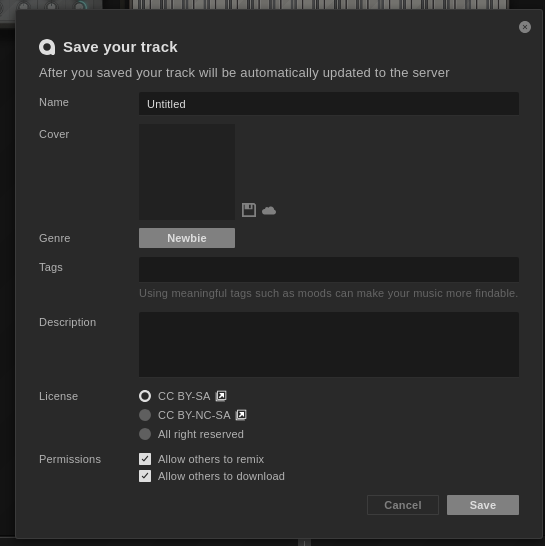
Give your project a name and press save. Don’t worry about the other options, they will only become relevant once you publish the track.
From now on, all your changes wil automatically be stored in the cloud.
Studio Overview
The studio is made up of a few sections. The area here is the Desktop. This is where you can see and connect the devices you want to use. It is also where you can turn the knobs and edit the parameters of the devices you are using. It’s modeled after real life!
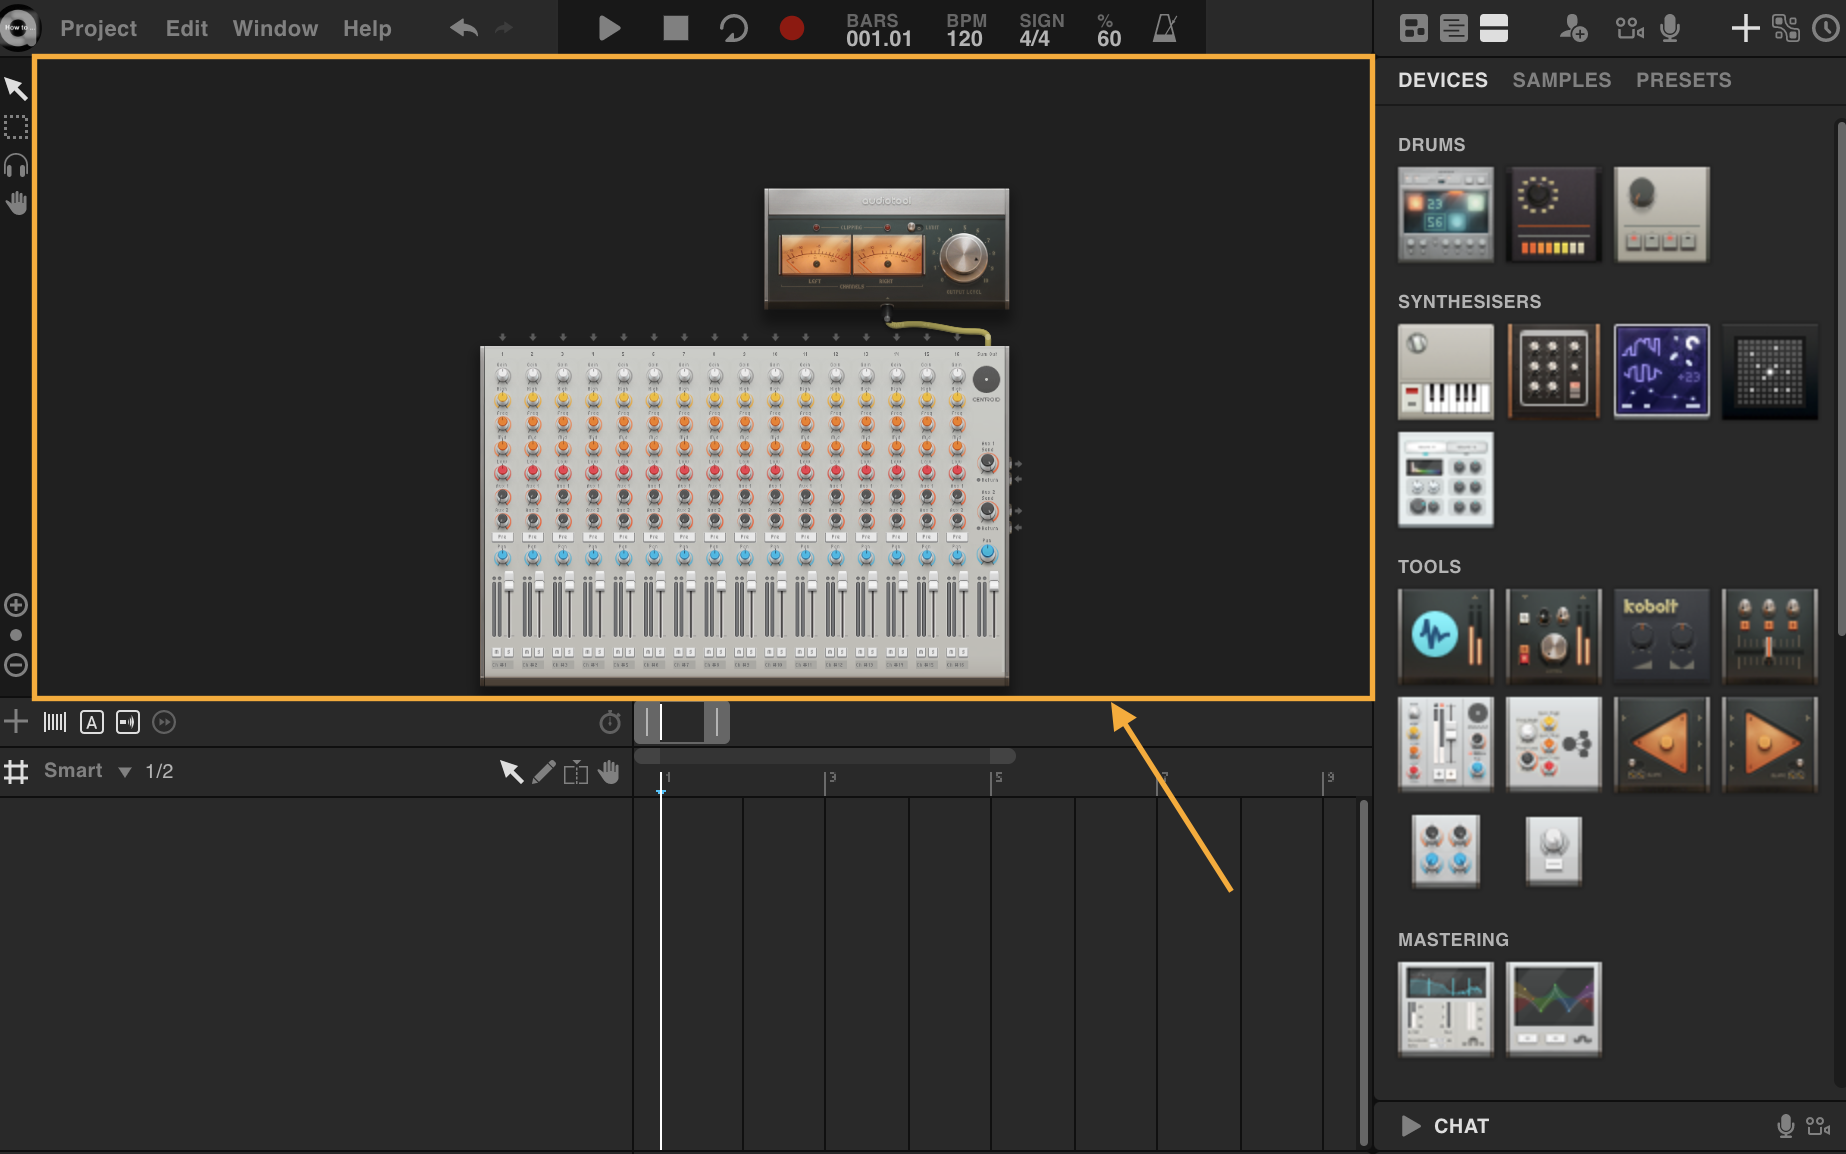
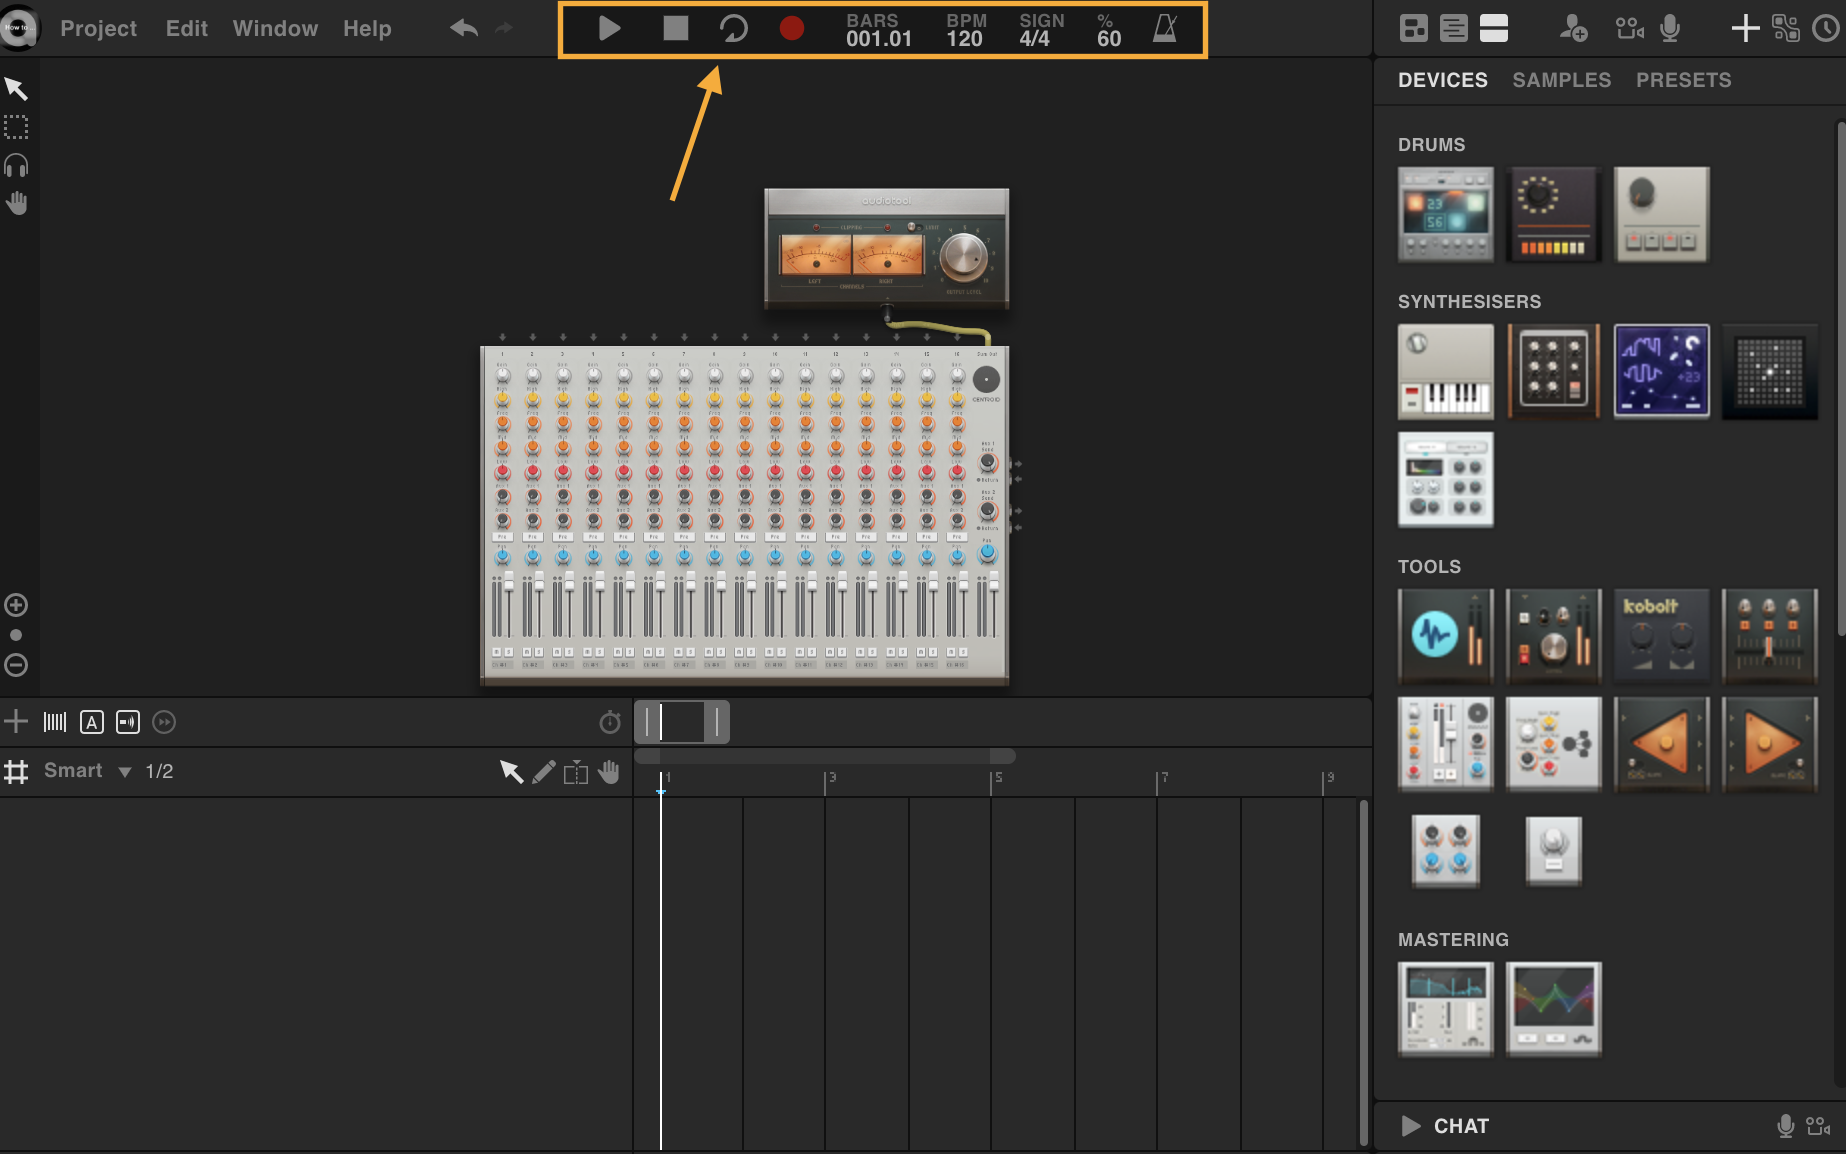
The top section is the main controls for the song. You can play, stop, and record here. You can also set the beats per minute (bpm), time signature, and shuffle amount. To edit them, double click, and type the desired value.
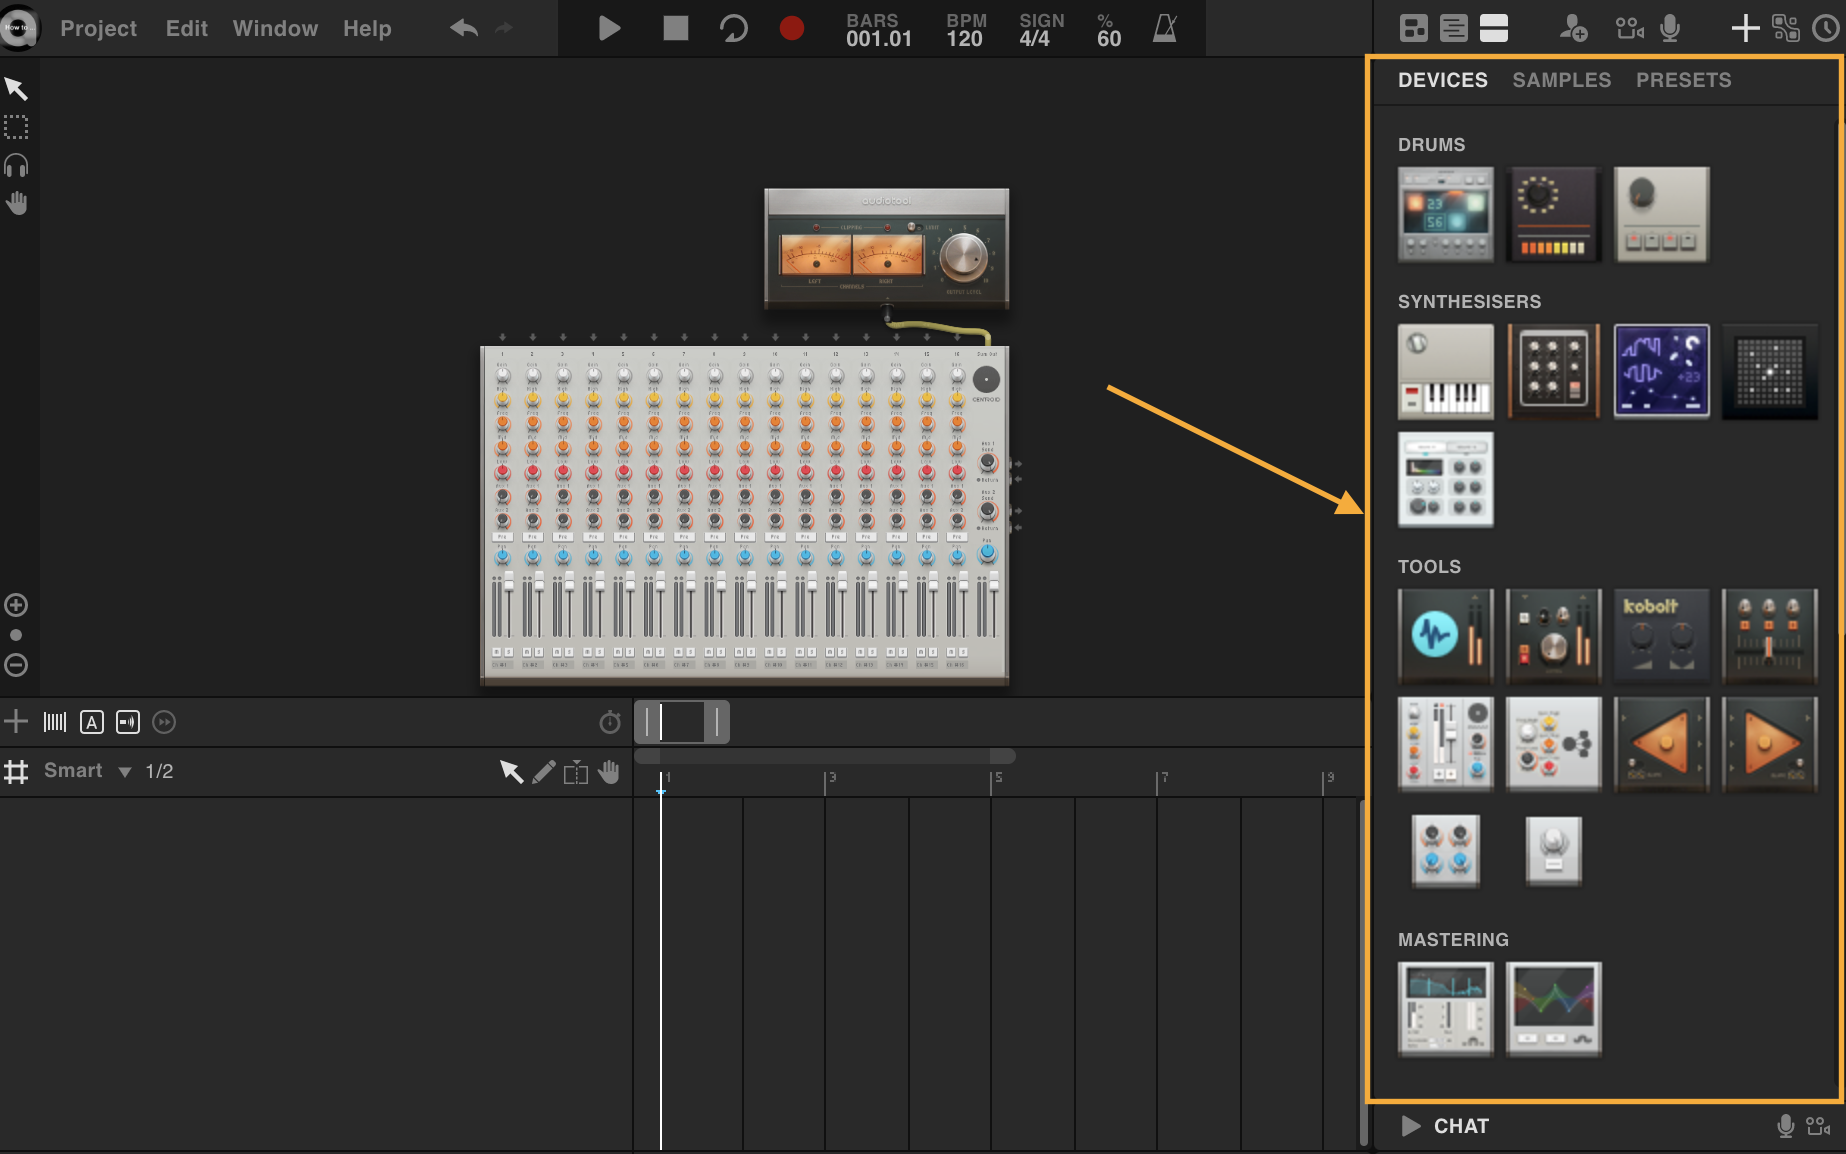
The panel is where you can drag devices from to the Desktop. There is a large selection of drums, synthesizers, effects, and other plugins.
The Timeline is where you will arrange your song. It is a visual representation of your song over time.
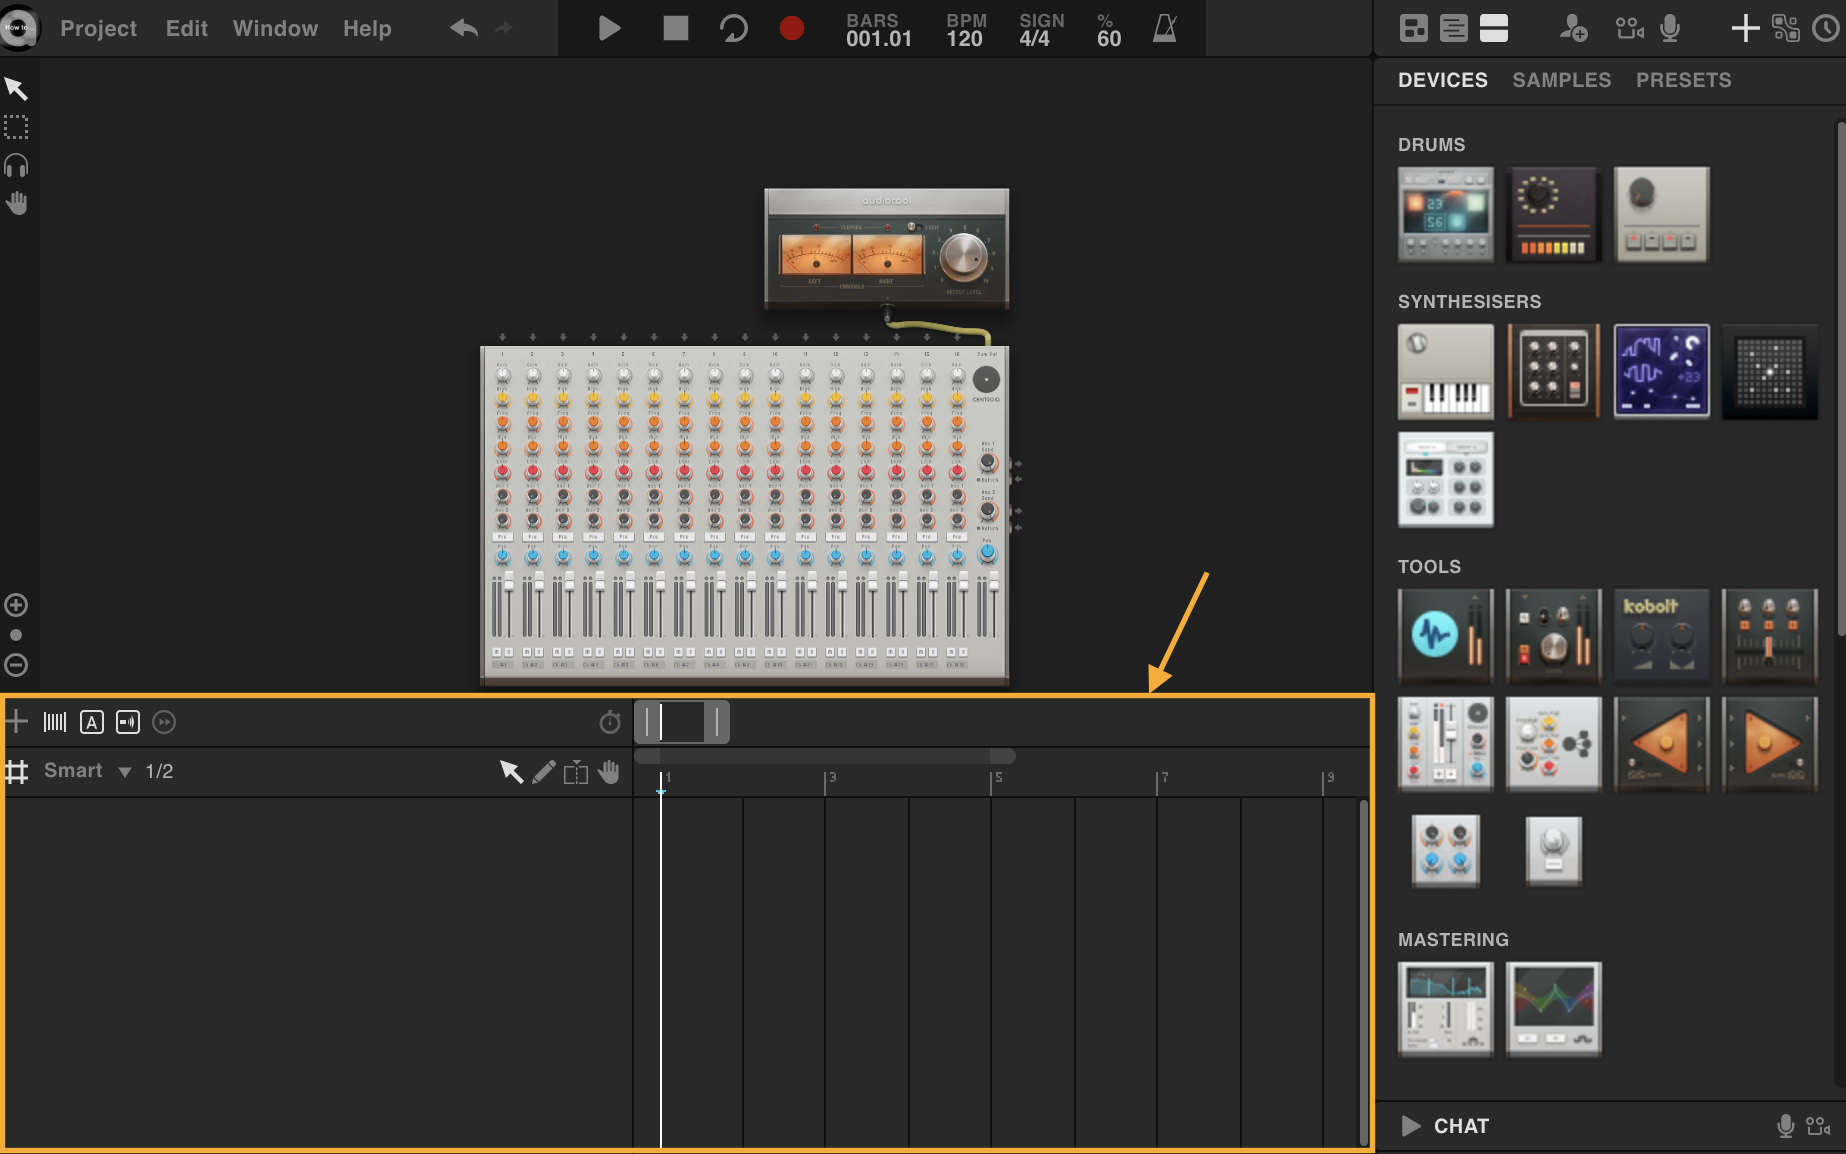
The Timeline is separated by rows called tracks. Each track represents a specific audiofile, automation, or MIDI sequence. In otherwords, the timeline helps to organize all the sounds in the song, and control when they come in.
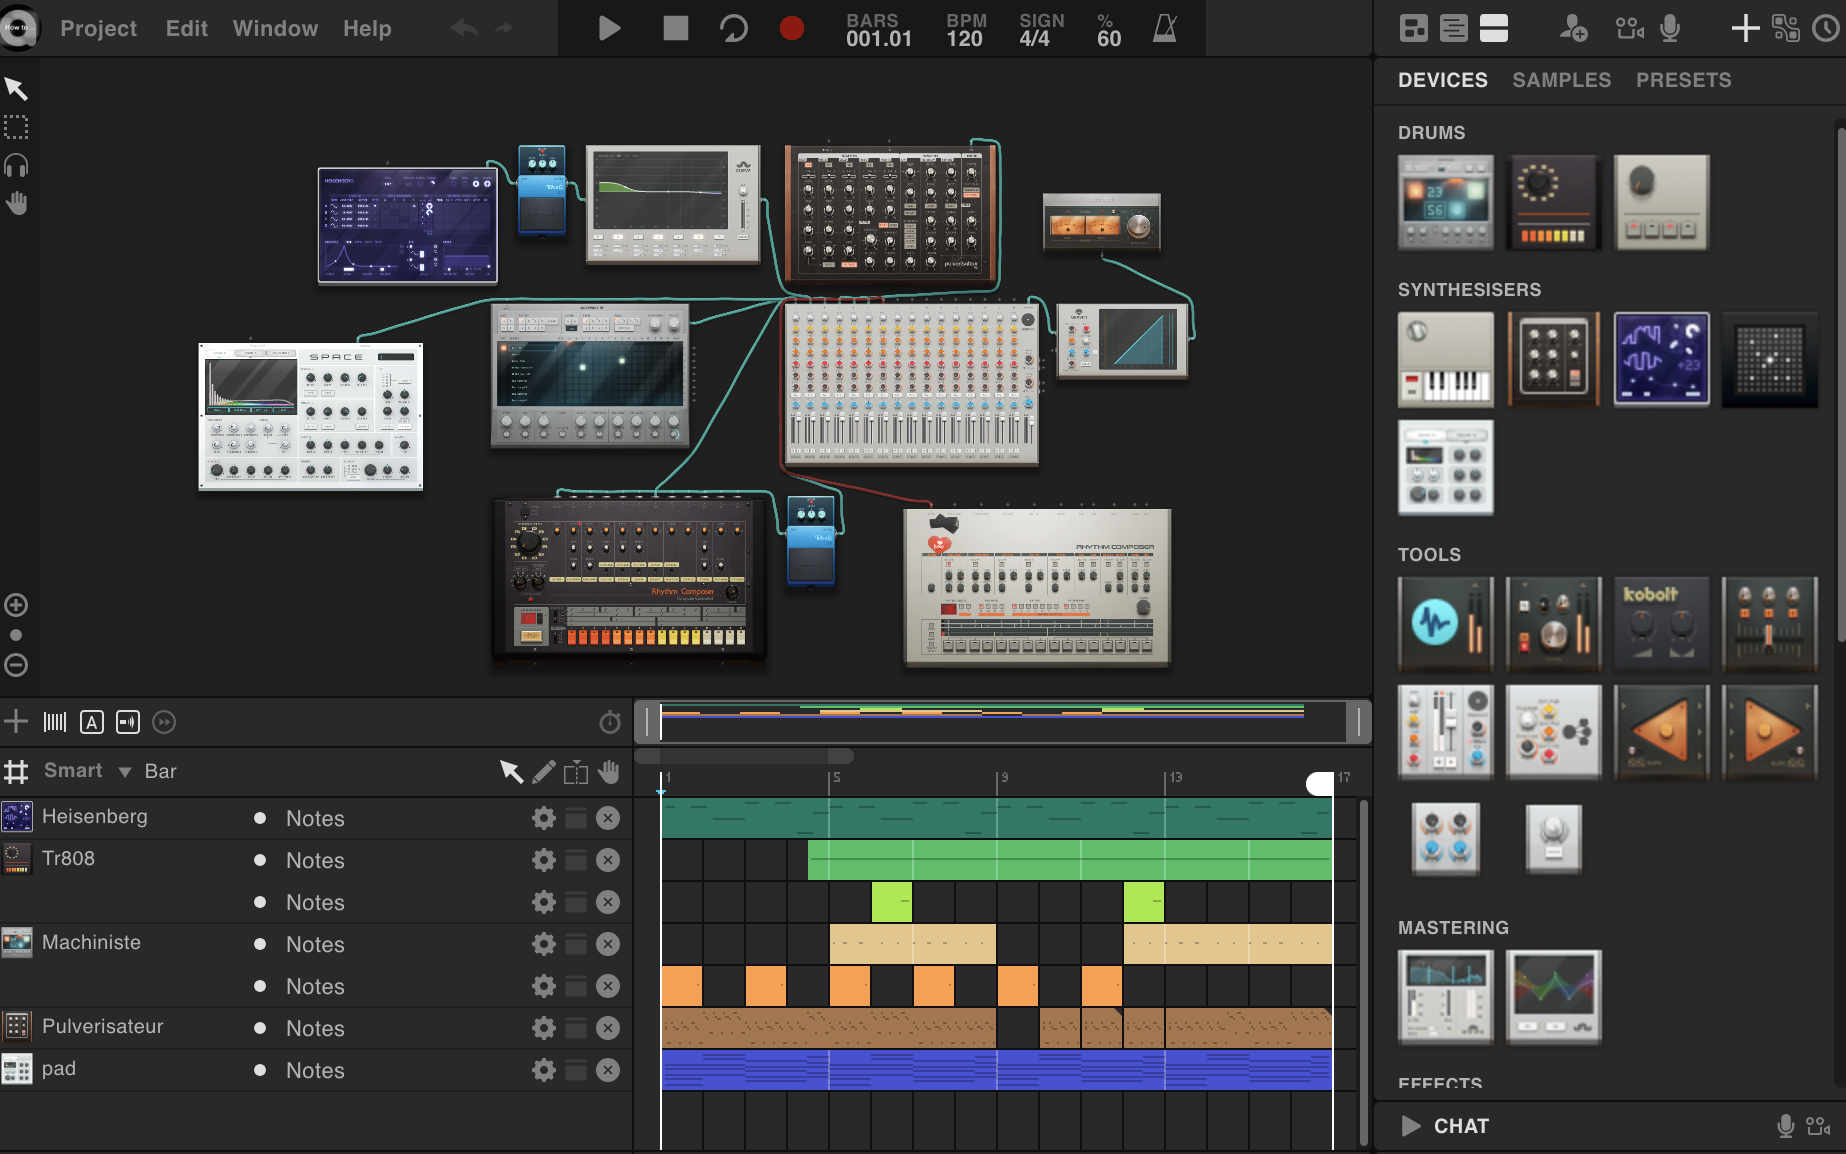
A more fleshed out project might look something like this:
Creating sounds
Add a sample
Audiotool has an extensive sample library database that contains both safe samples, and user uploaded samples. Samples are small audio files that you can add to your track. To find the sample library, click on the “sample” button in the panel on the right.
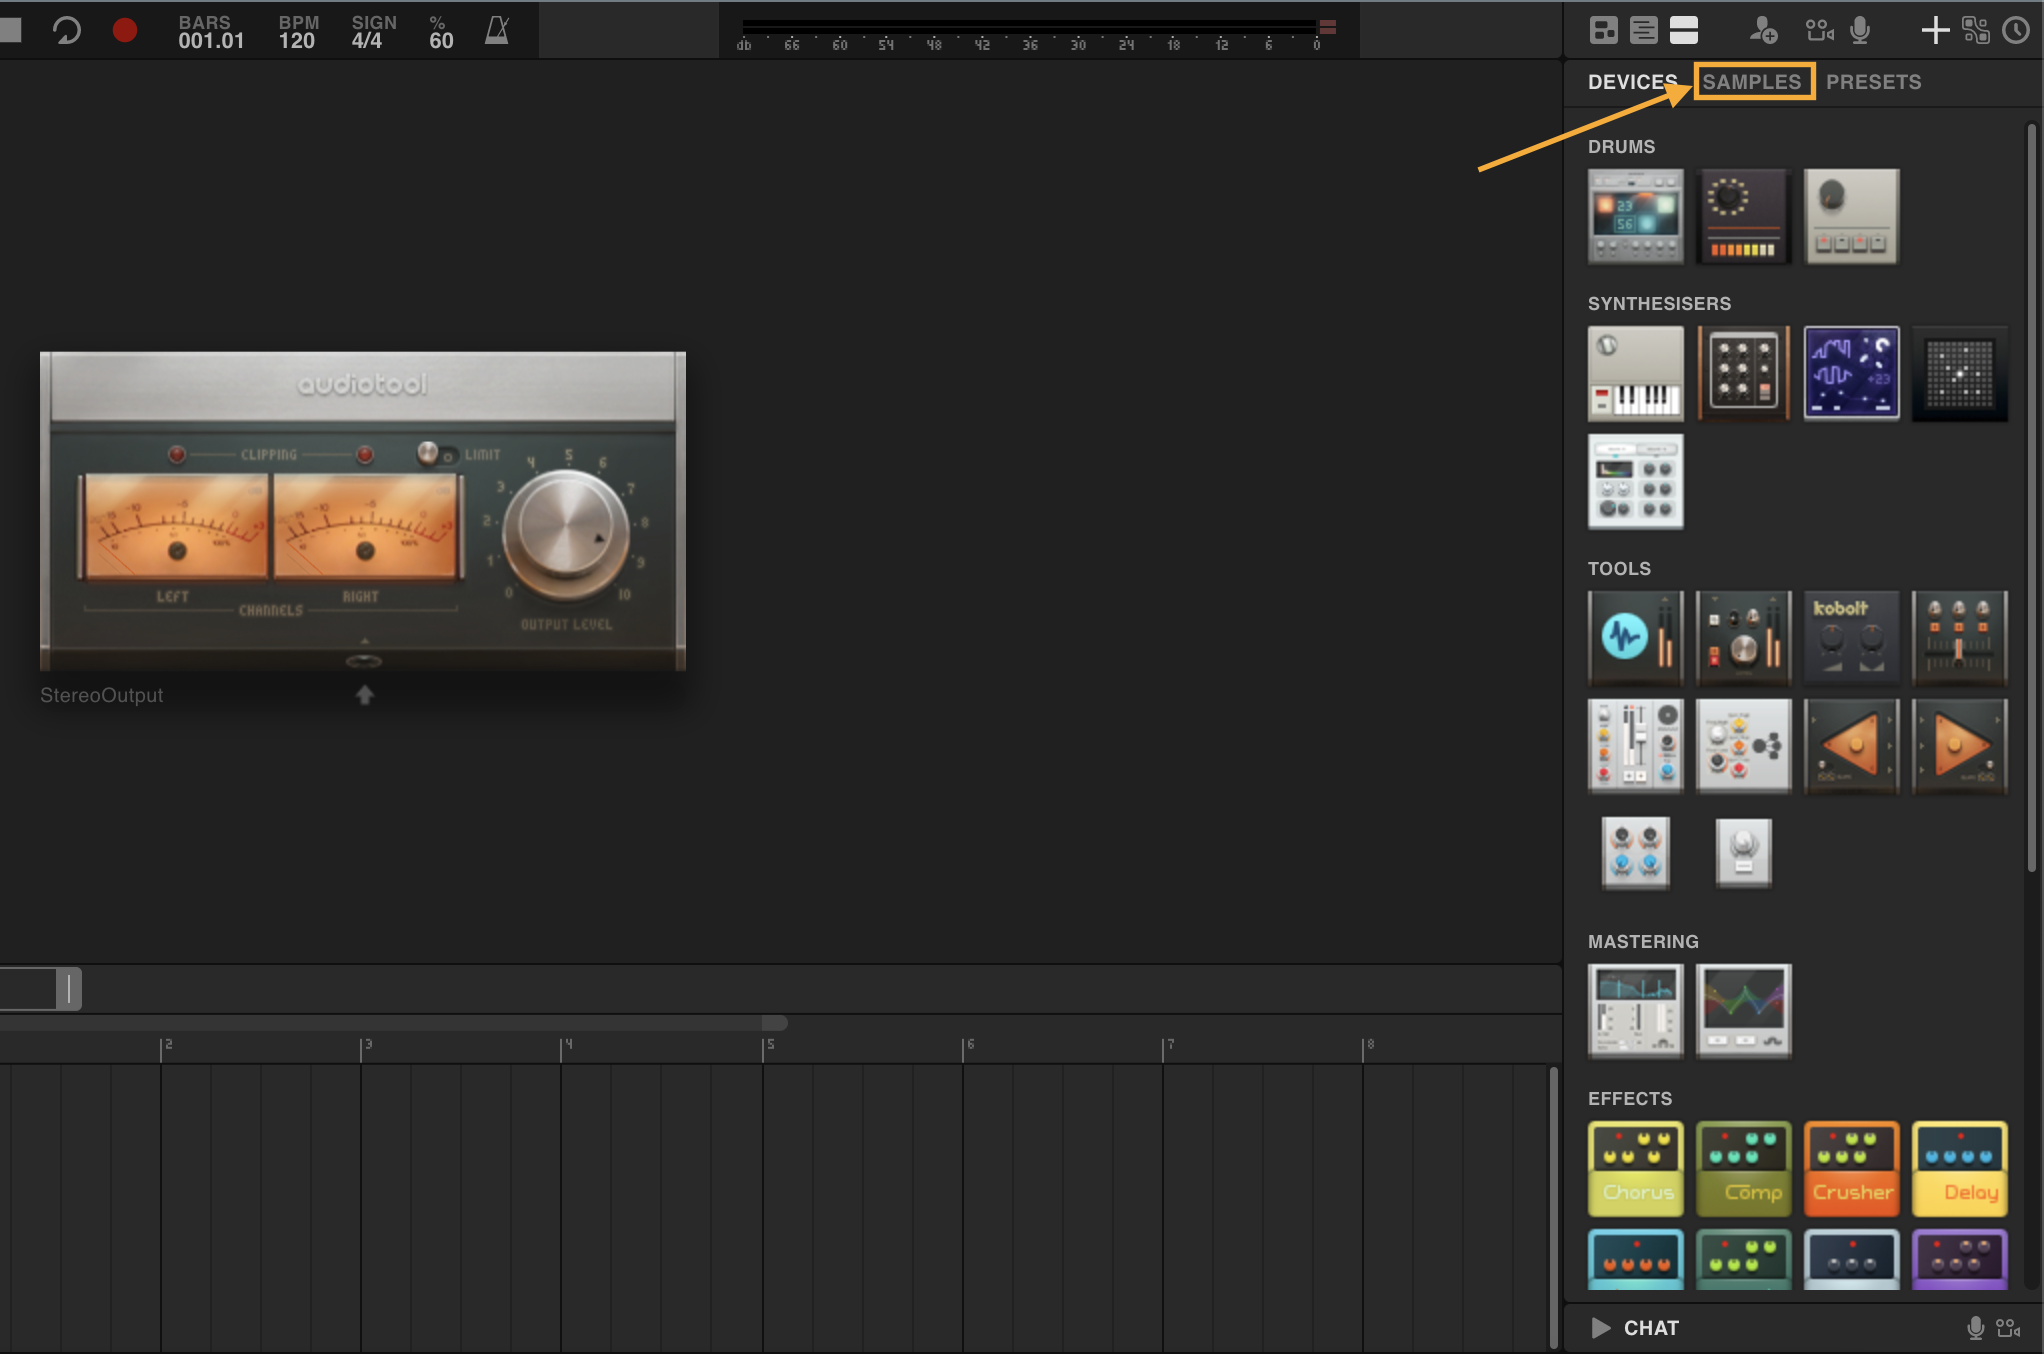
Here, you can search for a desired sample. To preview samples, click on sample’s text. You can click it again to stop playing.
Once you find the desired sample, drag it out onto the desktop to add it to your project. An audiotrack device will appear on the desktop and a new audiotrack will be created on the timeline.
Now you have the sample in the track! The sample will automatically be placed on the beginning of the track.
Add an instrument
If you want to create your own sounds without soly relying on samples, you can use Audiotool’s selection of instruments. The drum instruments are for percussive sounds, and the synthesizer instruments are for melodic sounds. Let’s drag out a synthesizer called the “Pulverisateur”. With so many knobs and buttons, it might seem intimidating, but it doesn’t take much to make some really cool sounds out of this.
Notice that in the timeline, a row called “Pulverisateur” has appeared. This is a note track. Double click on the note track to make a rectangle area in the timeline called a note region. Double click on the note region to reveal a piano roll.
This is where you can create melodies. Double click in this timeline space to create notes. You can also drag the notes to move them around. To change the length of the notes, drag the right edge of the note.
Now you can create your own melody! You can do this for multiple synthesizers and note tracks.
Arrange timeline
Now that you have a few sounds, you can arrange them to come in at specific times. To do this, click on the regions and drag it to the desired time. You can also drag the right edge of the region to extend it. This will loop the region automatically according to the loop markers within the region.
Publish your work
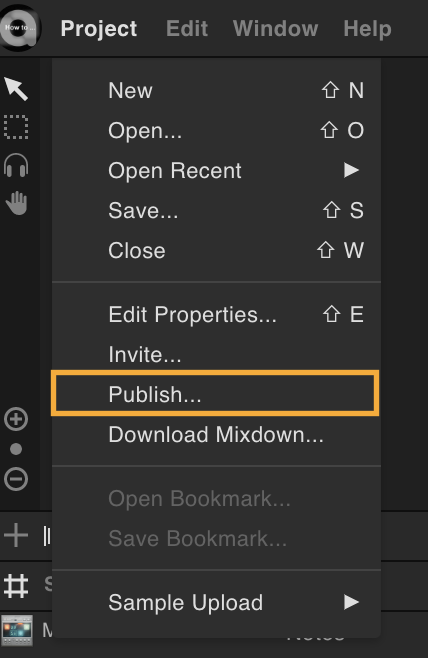
Great work on the song! When you feel your song is finished and ready for the world to listen, you can publish your track on Audiotool. To do this, Press File -> Publish
This will take you to a publish dialogue where you can name your song, add cover art, and write a description. Make sure to add tags and a genre, to make your music easier to find.
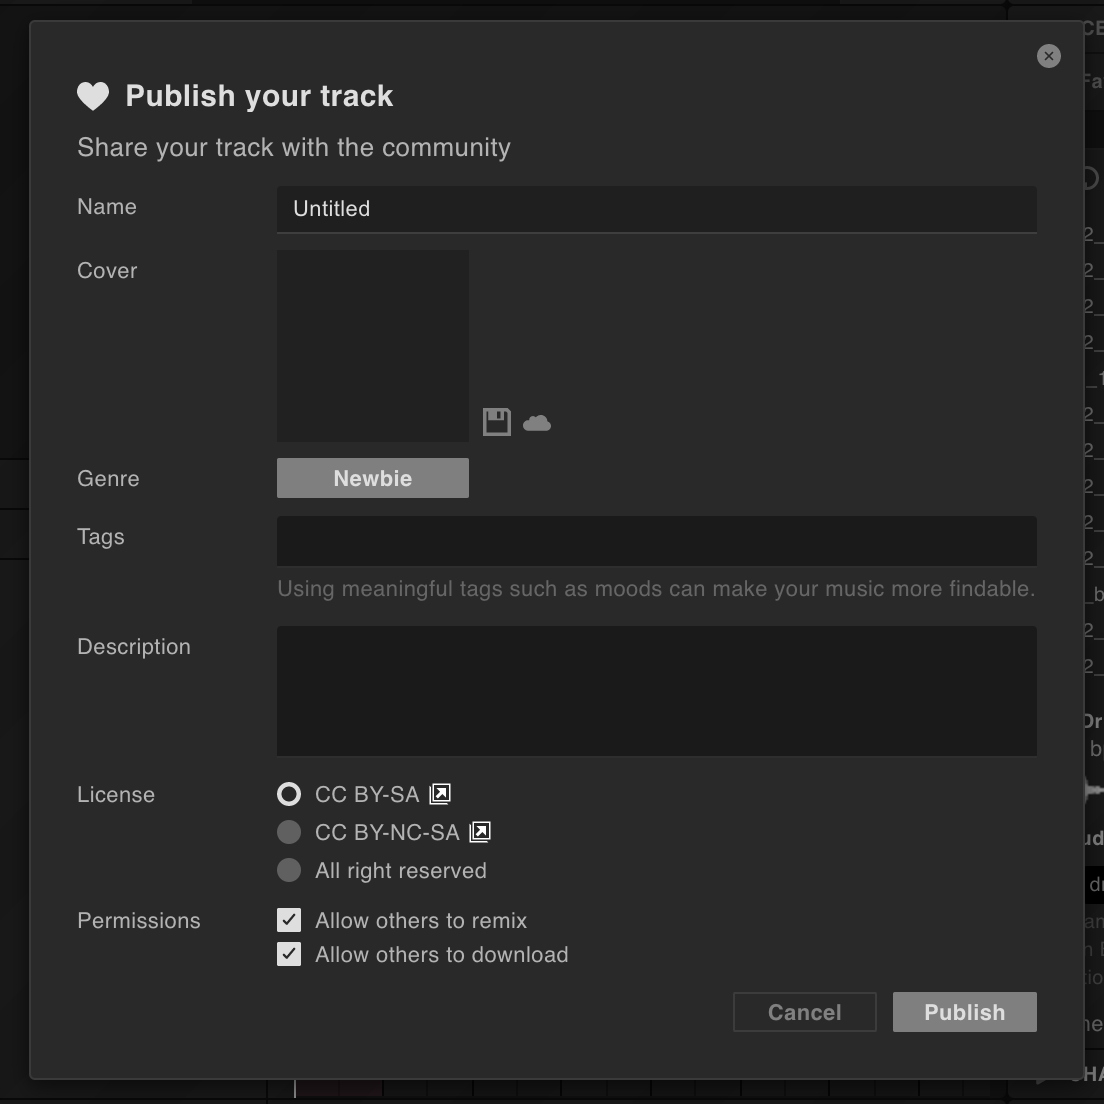
When you have finished filling out the track information, click the “publish” on the bottom. Once it finishes loading, you can find your track on your profile at audiotool.com.
Congratulations!